Note: You don’t need an expensive camera to shoot in manual. Most point-and-shoot cameras offer this option! Check your manual! Learn before you buy a DSLR to figure out if photography is going to be your passion/hobby/profession (get a more expensive DSLR), or just for fun/just for snapshots (get a 3/4 camera or a point-and shoot).
Instead of doing a FANTASTIC job of writing a post to explain when to go with manual settings or how to go to manual settings, I found two posts that said it just as well (ok better) as I would have had I written it myself (and linked them to their respective topics). I do, however, want to ILLUSTRATE the difference to you. The major difference (in my eyes) between auto and manual modes is the amount of control over your camera when taking photos. In auto, everything is automatic. Aperture, shutter speed, focus point, ISO, flash/no flash, all inputs are selected by the camera based upon its built in light meter which chooses the most likely object you are trying to shoot based upon where you point the camera. Really. I know what I’m trying to take a picture of, and my camera isn’t as intuitive as it thinks it is. Photographers like manual mode because it gives us the ability to select where the lens focuses (point of focus), how wide the sensor opens (aperture), how much support the camera is required to provide (ISO), lighting selections, and so many other settings, when attempting to capture an image. If you read your manual, know your settings, and understand exposure, you have a better chance of catching your image than when you simply point and shoot. Here are a few examples that I shot today to illustrate my point.
Barkley. My dog, Barkley was the first to get shot with my Canon today. He hates the camera and looks thrilled to participate. Anyhow, as he lay amongst my kids toys, I hit him with an “auto” first.
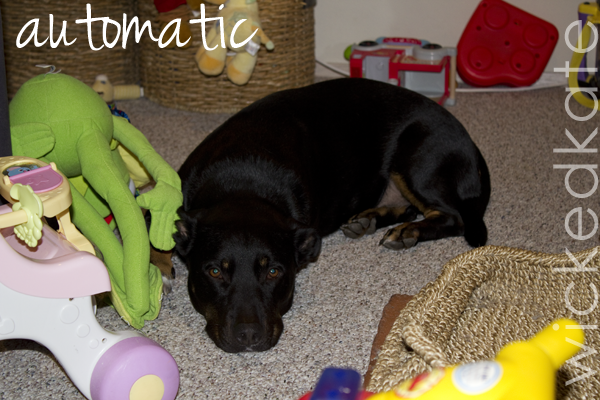 Not too shabby, right? I got the whole dog (and a bunch of our mess) in focus. But, it seems dark to me. The auto forced me to use my flash, and it cast shadows that I don’t like much. Oh, and I love the wacky eyes. So I threw it in manual and this is what I got:
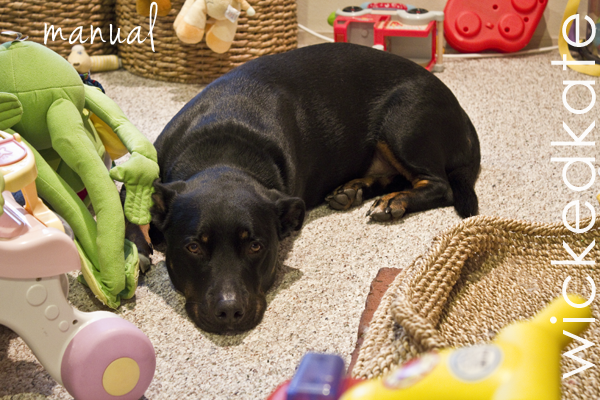
Yes. There is still a shadow under some of the articles in this photograph, but those are cast by the ::sigh:: overhead lighting in my playroom. This is a more realistic view of my room, the light that’s in there, the details, and look at Barkley’s coat! It’s shiny! My dog is black (clearly). It is super hard to take pictures of black animals if you don’t know what you are doing (as evidenced by the photo I took in Manual). I used manual to capture the reflection of his coat, focus between his eyes to capture his expression, and make him look more like a lazy dog than an angrier looking dark one. This is what my little buddy looks like (unenthused by the camera) when I see him (and the camera is in front of my face). Wha’la. I may not be Ansel Adams, but this is my reality, and this image better captures what I was attempting to remember when I hit the shutter.
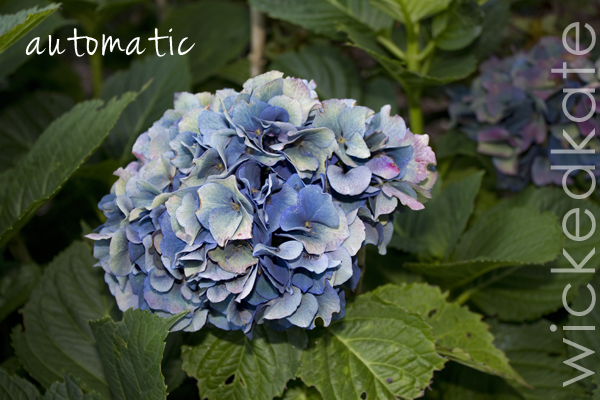
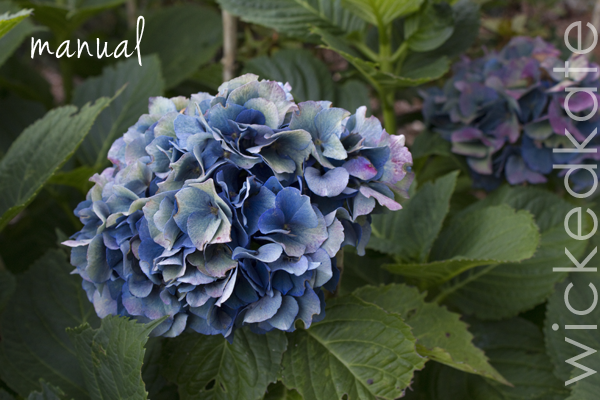
Another example? Sure! How about those hydrangeas in my front yard that I’m obsessed with and look at constantly? Sure! I head out to the front yard at dusk, and of course my auto setting required that I used my flash. Boom. Now the picture isn’t bad, but it isn’t really capturing my memory. It is in focus, and not bad overall. Here are my “hummmph”s about this one: I don’t wanna highlight the bug holes in the leaves underneath the blooms. The bloom color is distorted by the flash. The shadows are exaggerated, and the highlighted portion is larger than I would have liked because the point of focus was not where I desired it to be. TO MANUAL!! ::awkward leap to the next photo::
Hey now! This one has better color balance. The bug spots are there but no longer highlighted. I can see the other bloom better, and the colors are much more true to life! The flash didn’t ruin the different shades of blue in my bloom, and it makes it look dreamy to me! Le sigh… I love hydrangeas. I set my point of focus right in the center of the bloom, so there is a depth of field that allows the front most flowers to be in focus and the farther back ones are more blurred, where as the prior photo attempted to keep it all in focus. I like this way better. Funny. I didn’t know I liked flowers as much as I do until I started taking pictures. Funny how that works. One more example…
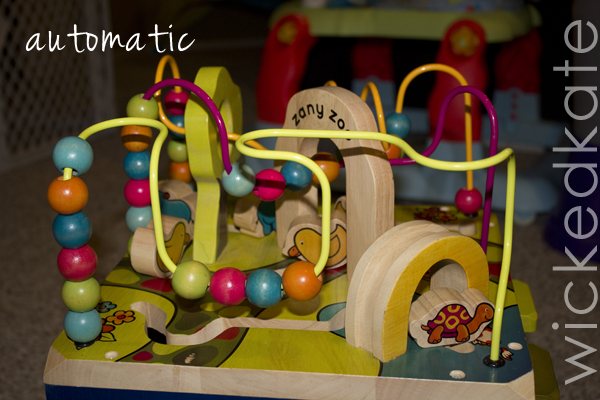
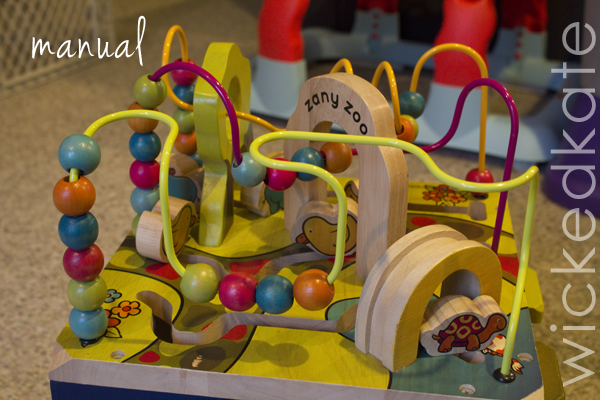
Back in the playroom, I picked up a complicated toy from Zany Zoo my son loves. The flash popped up (shooting at/after dusk makes this a regular hazard) and it cast funny shadows from one wire to the next. Its a complex toy, and you can’t really see much of it because the camera didn’t automatically focus at the point I wanted it to. The background is all blacked out, so the memory of the surrounding environment is omitted. If I’d been going for a shot like this, it isn’t an altogether bad shot. I just was going for more of a “remember when we used to play with this in the playroom? Boy loved that thing!” shot rather than a “this is the toy in a room where Mom didn’t let us turn on the lights”.
This picture is brighter and more fun looking. There are still shadows, but again, that’s the reality of the room. The environment is better captured, and this looks more like I was trying for it to look.
Really, the best way to learn this principle is to take LOTS of pictures. Play with settings. See what they do. Find your style. In the beginning, attempt to keep your exposure in balance (at zero or slightly above). After you figure that out, play with higher and lower exposure levels to see what you like! Your preference may not match the computer’s idea of right, and you will need to learn to take your pictures at those settings. If you’re looking for more information in how to balance your aperture, shutter speed, and ISO to capture your images, check out my suggested reading. Understanding Exposure HONESTLY helped me to take a gigantic leap forward in my understanding and a huge improvement in the quality of my photographs. It was an easy read, and I recommend it whole heartedly.
With all this said, auto does have it’s advantages. In situations where I will be really upset if I don’t get an image of something, I will hit it with an auto along with my manual shots so that I cover all of my bases. Also, if you’re looking for an easy way to figure out how to set your manual settings, take a picture in auto. Then look at the display of that picture to see what settings the camera selected given its situation. Then, tinker with the settings that you think could improve the picture. Again, it takes practice, and each camera is different, so to really get consistent on your photography, you are going to need to practice.
Ok photographer friends. I know I’m just a fauxtographer. I’m not a wanna-be-pro. I just want to help my friends, at least for now. SOOOOO, give a girl some feedback? Hook up my readers with comments that might clarify something you read that you think needs more info? Hit me with your best shot. I shoot a Canon. I can take it :).
