If aperture is how open or closed your sensor is (how wide your eye is open), the shutter speed is how fast it opens and closes (how fast you blink). In this tutorial, I will show how varying shutter speeds effect your photographic outcome. The most basic way I can explain this principle is the example made by the two following photographs of the same waterfall:
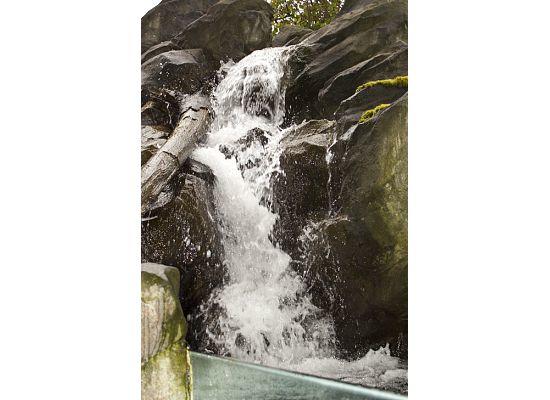
speed: 1/200 sec at f/4.5
In this picture, the camera had the lens wide open. You know this because the aperture (generally between 1 and 22) is relatively low at 4.5. The camera opened and closed the sensor very quickly (1/200th of a second). Because of this, the camera was able to use the natural light in the room to capture the water faster than even the human eye to create this image of individual drops of water falling over the waterfall. If the room had been dark, the photo would not look this way. Luckily, it was a bright room, which made this possible without a flash.
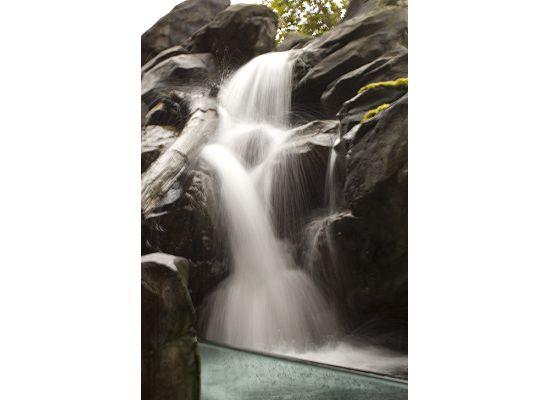
speed: 1/2 sec, f/22
In this image, the aperture was very high (22 of 22) which indicates that the lens was not open very much at all (like squinting). I held the camera as steady as possible (this was a hand-held shot – not on a tripod), and set the shutter speed very slow at 1/2 of a second. If I’d moved at all, the blur on the rocks would be much worse. If the sun hadn’t gone behind a cloud, I might have even had this picture “burn out” or “over expose” causing it to be a white page all together because the lens was open for so long. Luckily, the natural light allowed me to capture this without the use of a flash, and without the need for a hood (to block sunlight). However, a sense of motion can be seen and the picture slightly blurred because the lens was open for long enough to capture the drops in several positions as opposed to frozen in a single space as in the previous photograph.
The images below offer a more in depth view of shutter speed. In them, I use the phrase “ISO” which will be covered in a later post. For now, you need to know that ISO is a measure of how much support your in-camera computer needs to give your settings in order to achieve your photograph. The higher the number, the more work your camera has to do for you. This can create noise (spotty color), and/or errors within your photograph, or it just may make it possible to achieve a photograph outside of your normal reach.
I’m going to illustrate this in shutter-speed priority mode (Tv for Canons). When you shoot in this mode, the camera takes your input for shutter speed and then automatically adjusts aperture and ISO to best capture the object placed in your point of focus. None of these photos have been retouched in any way.
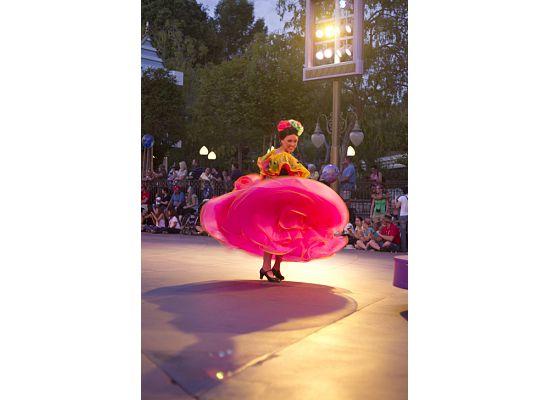
speed: 1/20 sec, f/2, 50mm, ISO 100
When focusing on this dancer in a Disneyland parade last week, I slowed my shutter speed to 1/20th of a second. There was enough light to capture this photo. As you can see, the motion of the dancer’s skirt is captured as a blur while the slower moving parts of her body remain caught in a single position. My camera’s settings (wide open aperture of 2) allowed my sensor to not have to support with very much ISO (a low 100 out of 3200 possible with my Rebel T2i).
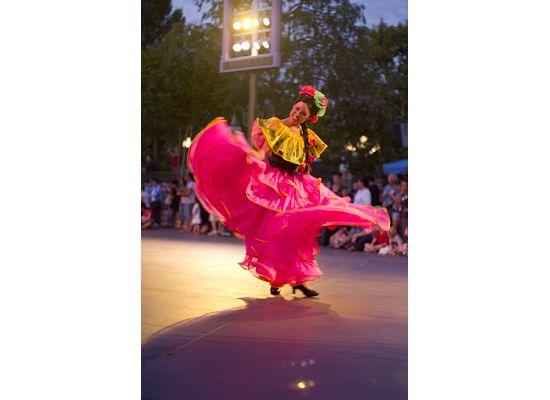
speed 1/80 sec, f/1.8, 50 mm, ISO 250
This is the same dancer literally half a second later. I sped up my shutter speed. In order to capture enough light to get my image, the camera automatically opened my aperture even farther to 1.8 (the smallest aperture available on the lens I was using), and increased it’s ISO support to 250. As you can see, the photo contains slightly less blur, but still reflects the motion of the dancer’s dress. The reduction in aperture also made the crowd blurrier, as the lower aperture indicates a wider lens opening and a smaller focus area.
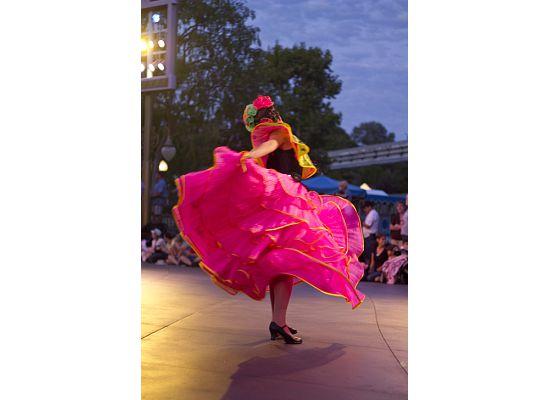
speed: 1/200 sec, f/2, 50mm, ISO 800
I simply rolled my speed up to 1/200th of a second just after I snapped the last shot to take this one. The camera closed my aperture to 2, but had to increase the ISO support to 800 in order to capture this image. You can see that the skirt has much less blur, but the photo is slightly darker because the camera is working overtime to get the image I’m requesting.
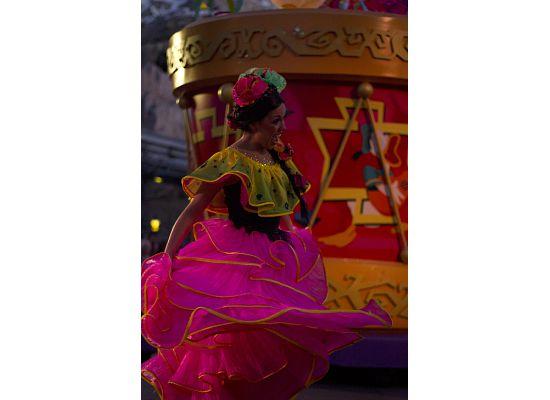
speed: 1/800 f/1.8 50mm, ISO 3200
The woman moved farther away from me in the parade, so I had to work fast. I increased my shutter speed to 1/800th of a second. The camera had to auto increase my ISO support to it’s maximum 3200. The photo is fine, but it is more of a “night shot” in that it is darker. I don’t mind since it was a night parade, but if I was looking for the same aesthetic as the others, this photo misses the mark. The skirt, however, is in full detail. The only way you know there is motion is because it is defying gravity by swinging out from the woman. There is no blur.
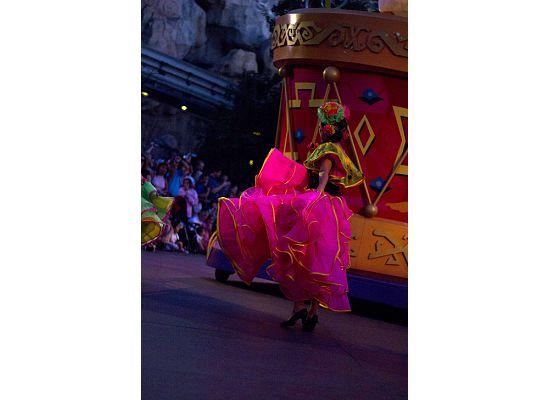
speed: 1/1600 f/1.8, 50mm, ISO 3200
The last image I shot of this individual was at a speed of 1/1600 with the smallest aperture possible on my lens (1.8). The computer worked overtime and gave me an ISO of 3200. This shot, in my opinion is underexposed (too dark). If I wanted it to be a more quality shot, I should have removed my camera from a Tv position into a full Manual (M) and toggled my settings to achieve my goal. The photograph does, however, illustrate how the skirt came into full detail with no blurring included in its motion.
Really, the viewer makes the ultimate determination as to whether or not a photograph is “good”. Each of these photos has merit, but each tells a different story through what it has captured. I, personally, like the first image and the third image for their composition. Editing of the lower two photographs could improve their lighting using Photoshop, but likely would become grainy/noisy. These topics, and editing, will be available in future posts.
Next week, I will show you how to customize your photographic experience by shooting in manual through a balance of point-of-focus, aperture, and shutter speed. Stay tuned!
